Configure the exam settings
Written By Florian Barral
Last updated About 7 hours ago
The exam settings are in the Configure tab. The menu on the right side of the page takes you straight to each section.

Time limit
Limit answer time: choose Whole exam for a single countdown across all questions. Participants see the duration before they start, then a countdown during the exam.
Time Accommodations: once the time limit is enabled, automatically grant extra time to eligible participants. See Manage Schedule Adjustments
Displaying subjects
Free navigation: participants can move freely from one page of questions to another.
Random order: shuffle the Sections, the Pages, the Questions on a page, or the answer Choices, so that each participant’s exam is different.
Embedded calculator: participants can calculate without leaving the Evalmee window.
Anti-Fraud Measures
Full screen required: the participant takes the exam in full screen.
Screen exit alert: the participant is warned if they leave the exam screen.
Screen recording: Suspicious moments captures the screen when the participant leaves the exam (recommended on site, when many participants share the same connection). Continuous video records the screen throughout the exam (recommended for remote exams, with a good connection). With screen recording, the exam is only accessible on a computer, not on a tablet or smartphone. Included from the Pro plan.
Disable spell checkers: turns off spell checkers and blocks access to the exam if a translation extension is active (Grammarly, DeepL…).
Enable screen recording
In the Configure tab, under Anti-Fraud Measures, click the menu on the Screen recording row (None by default).
Choose Suspicious moments or Continuous video (beta).
At the start of the exam, each participant must share their entire screen; until they do, they cannot start.

Need to exempt a participant from screen recording? See Disable screen recording for a participant
Proctoring
This section is only available on the Organization plan. If it does not appear, contact us to enable the option.
Camera proctoring: Regular captures takes photos of the participant at regular intervals. Continuous video records the camera and microphone throughout the exam.
Identity verification: with the Manual check, the participant proves their identity before starting. Only available with camera proctoring. See Verify and confirm the identity of participants
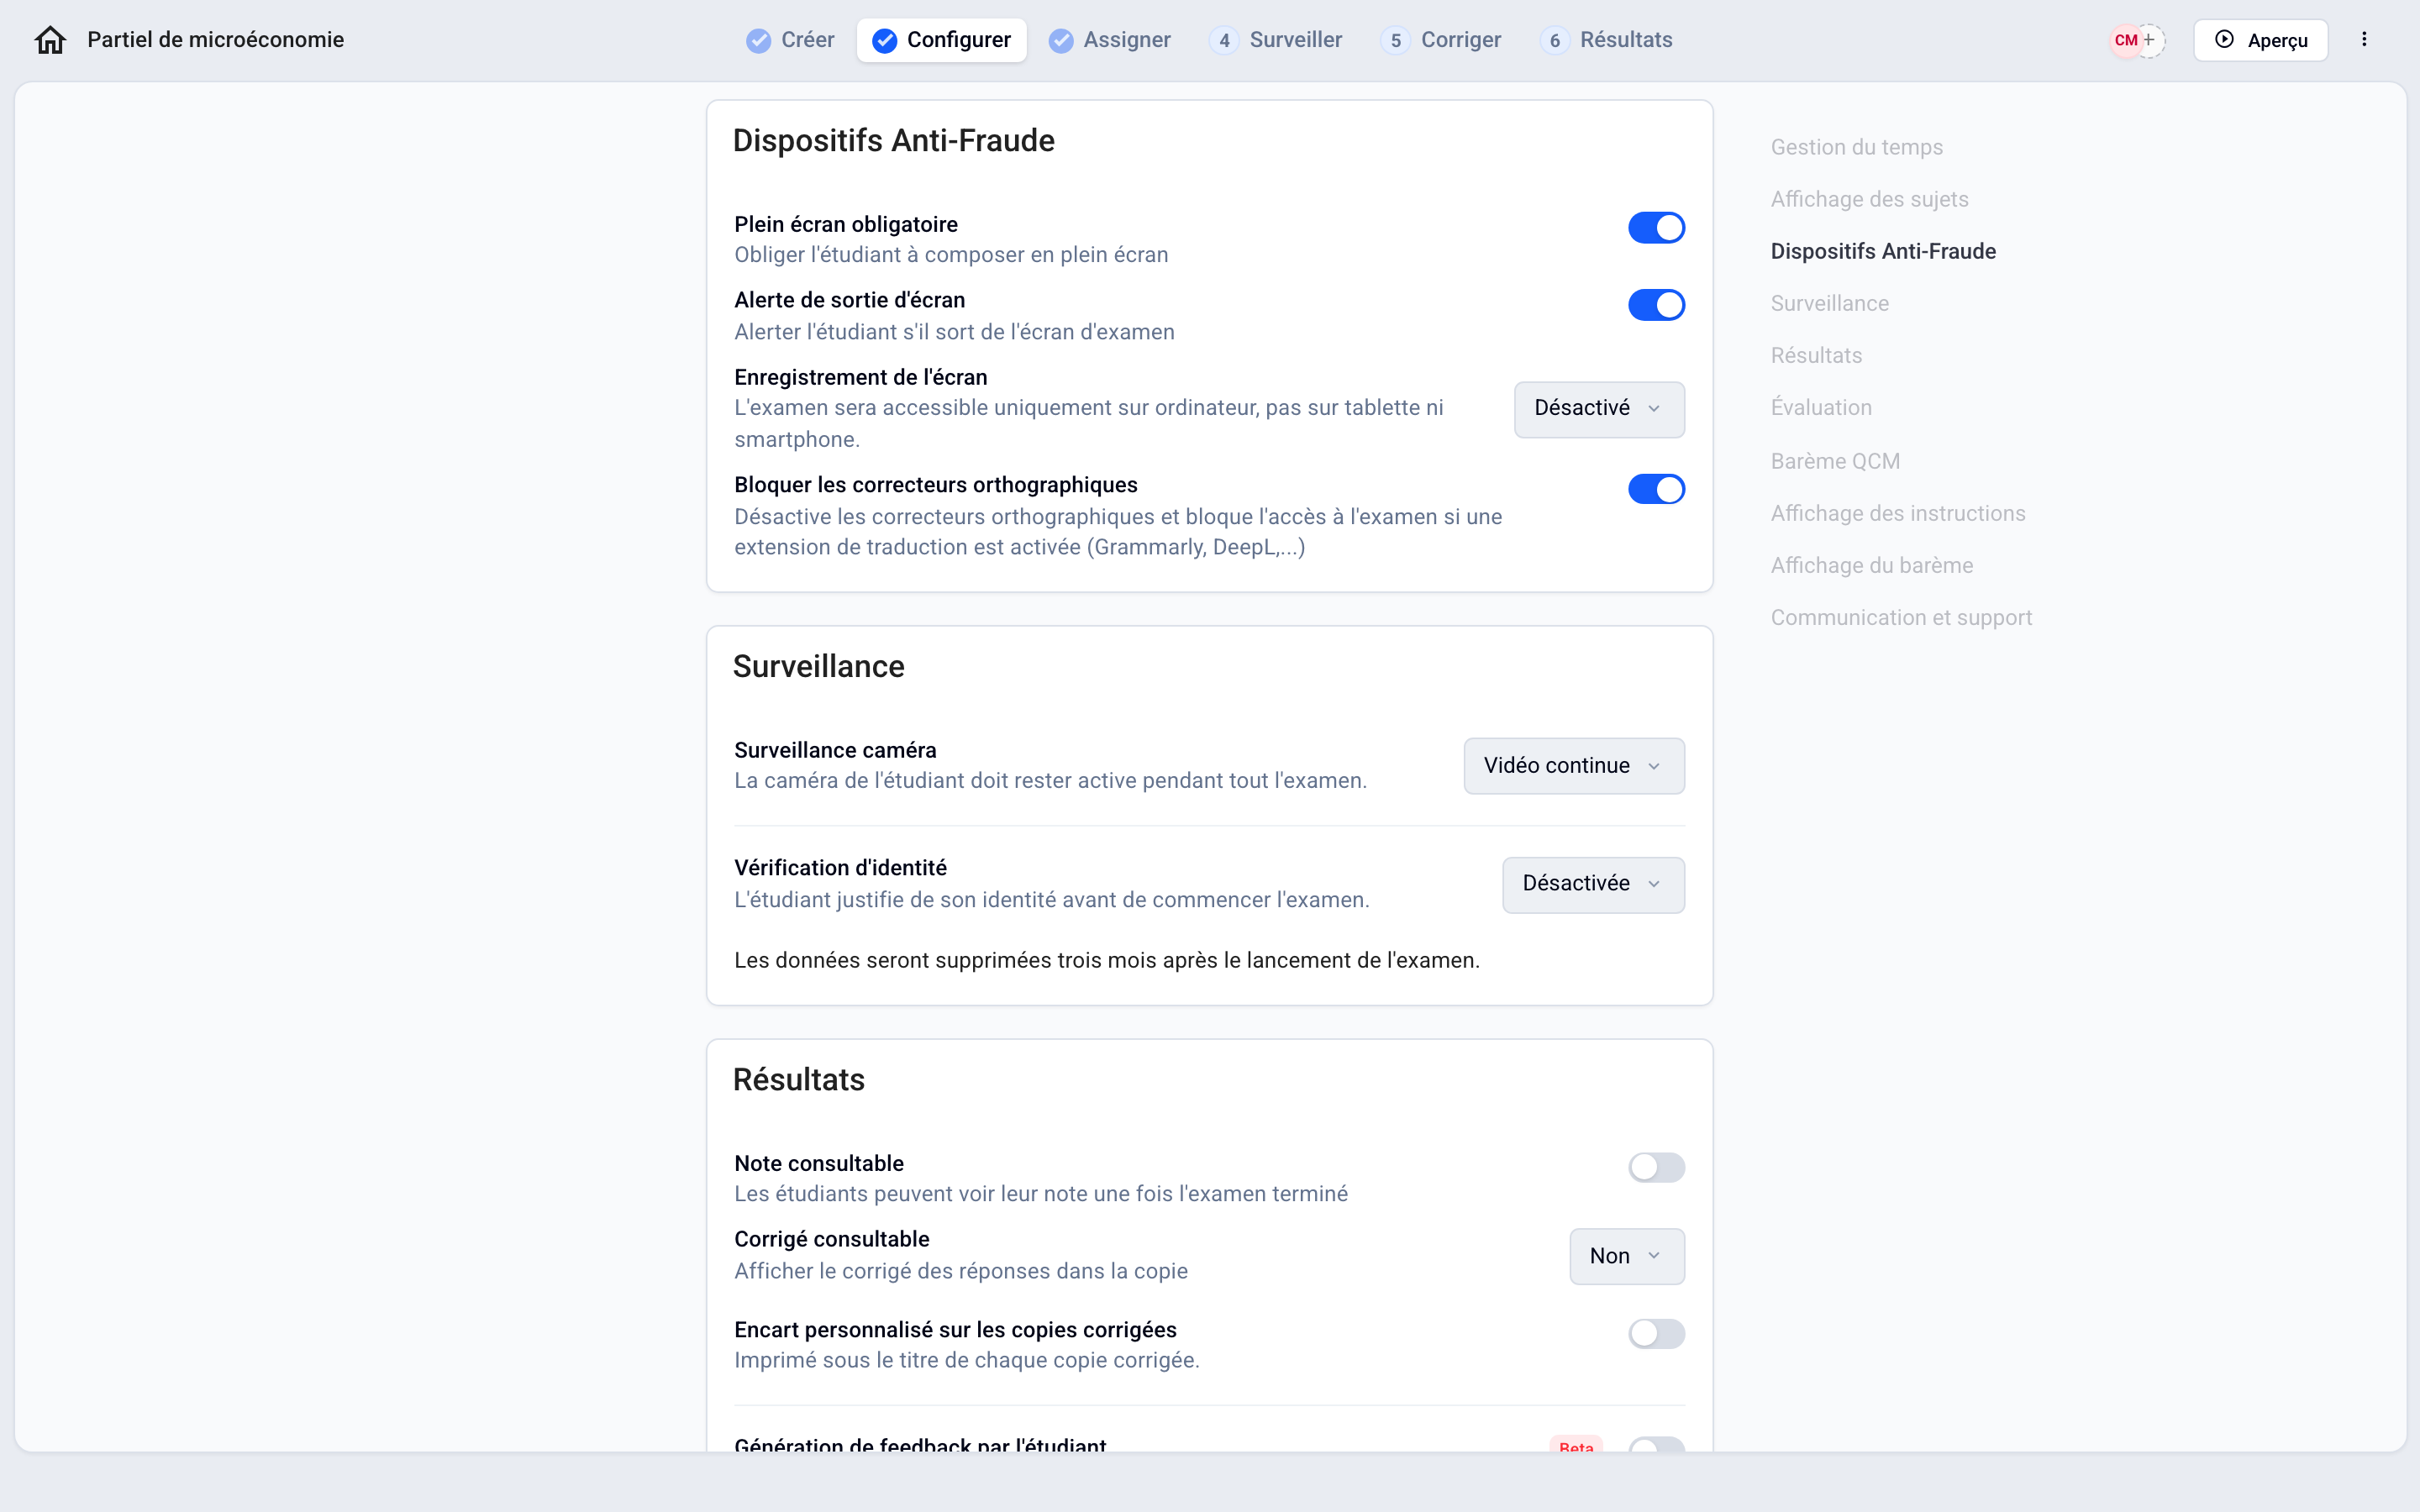
🔒 By default, proctoring data is deleted three months after the start of the exam’s first session (see the FAQ below). To analyze it, see Identify cheating
View proctoring data
In Monitor › Live, the camera icon in the Video column opens a participant’s Proctoring window (camera proctoring on).
A participant’s integrity report shows events and screenshots on a timeline. With Continuous video, the camera or screen recording can only be played once the participant’s attempt is finished.
How long is proctoring data kept?
How long is proctoring data kept?
By default, 3 months from the start of the exam’s first session. This duration is set at your organization level. After that, camera photos, screenshots, video recordings, and ID photos are deleted automatically, and the camera icon in the Video column is no longer clickable.
You receive an email 15 days, then 1 day before deletion, and an email confirms the deletion. Participants are also notified by email once the data has been deleted.
Why is there no capture or recording for a participant?
Why is there no capture or recording for a participant?
The option was not enabled on the exam.
With Suspicious moments, the screen is only captured if the participant left the exam: without an exit, there is no capture.
You turned off camera or screen recording for this participant, from ⁝ at the end of the row in Monitor › Live.
The attempt is not finished: the recording will be available once the attempt is finished.
The recording was interrupted (page reloaded, app moved to the background, screen sharing stopped, resolution changed, device storage full). The player then shows “No recording at this instant” and the reason for the interruption.
The retention period has passed.
Results
Grade visible: participants see their grade once the exam is finished.
Correction visibility: After submission, the participant sees their graded submission as soon as they finish. During, the grading of each page is shown before moving on to the next (not available with free navigation).
Custom block on corrected copies: a text printed under the title of each graded submission.
Feedback Generation by Student (beta): after the exam, the participant can generate feedback for each question.

To send the results, see Share the results with the participants
Assessment
Assessment Mode: Global Assessment or criteria-based assessment. See Configure the criterion-based assessment mode
Grading scale: the final grade is converted to this scale (20 by default).
Achievement Levels: assign a level (for example “Insufficient”, “Successful”) to grade ranges.
MCQ Grading
Define how single-answer, multiple-answer, and true/false questions are graded: Classic scoring (reward, penalty, limit on selectable choices) or Discordance scoring. See Standard Multiple-Choice Question Scoring Scale and Multiple-Choice Question Scoring Scale Based on Inconsistencies
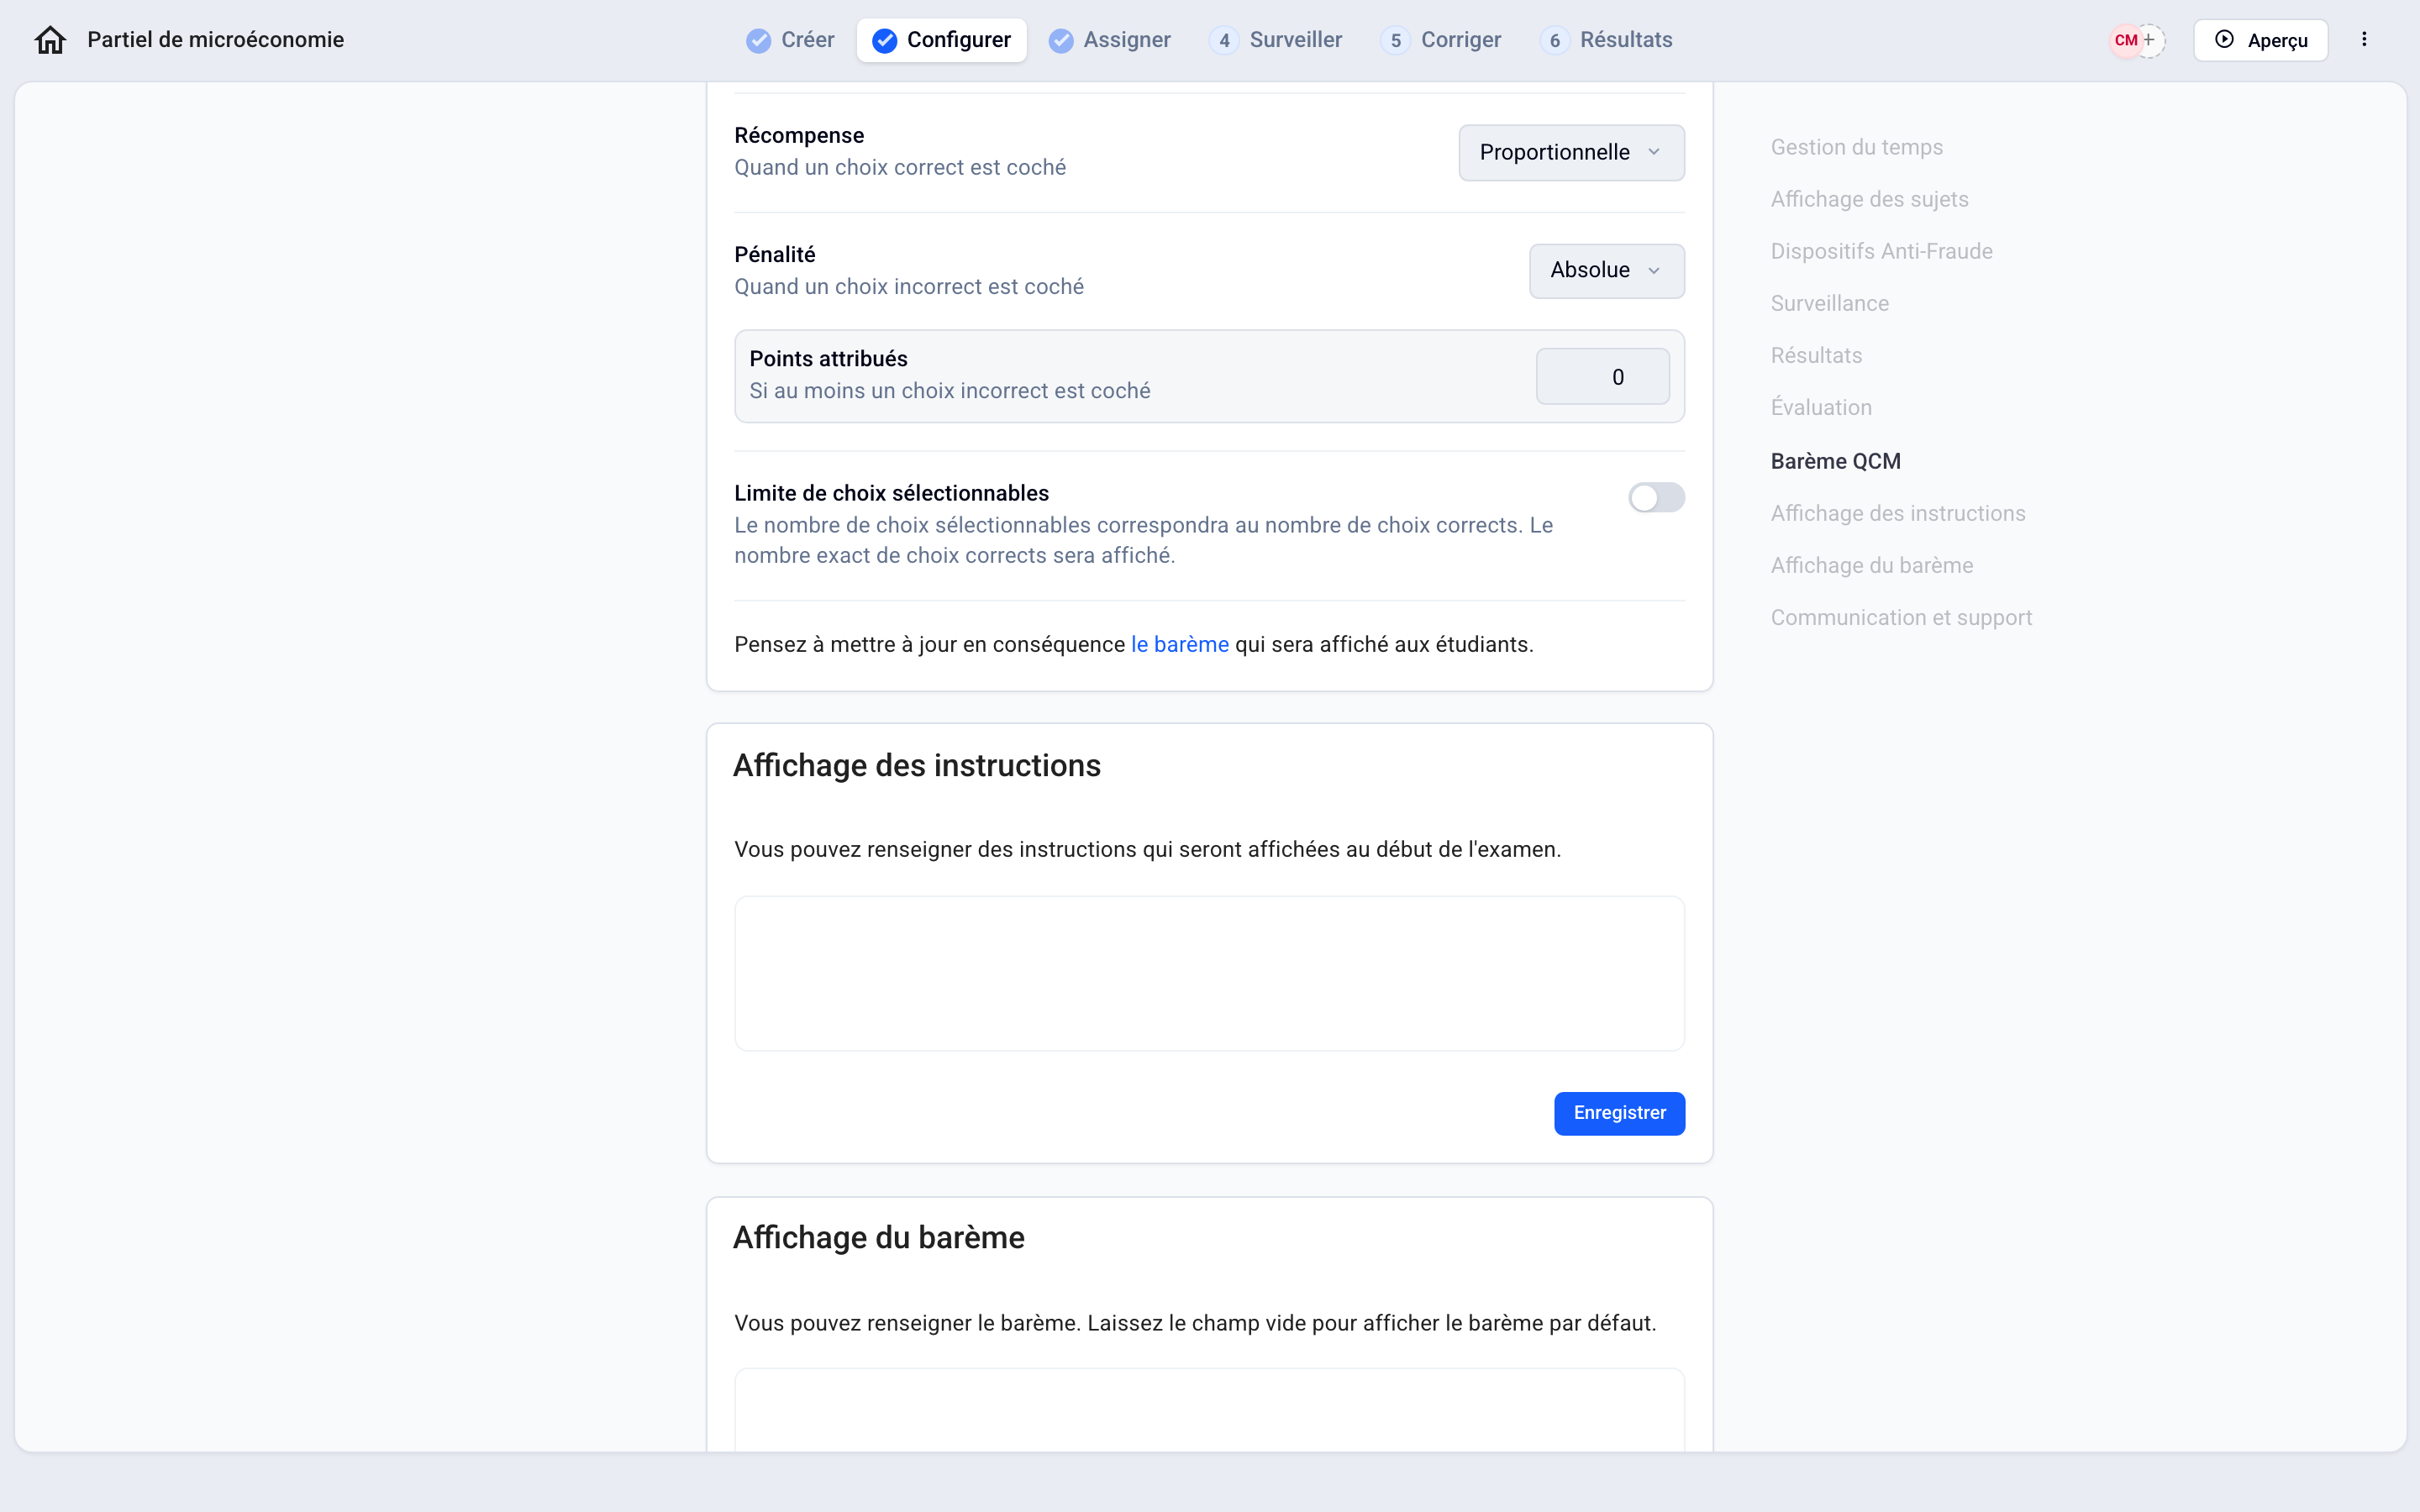
Instructions and grading scheme
The instructions and grading scheme shown to participants are written in the exam's welcome page. In this section, click Open in the editor. See Customize the exam's welcome page.
Communication and support
Live chat: participants can ask you questions during the exam. Stay on the exam page to receive notifications. See Examiner Chat <-> Participants
Was this helpful?
Still need help? Ask the team