Check and verify participants’ identity
Written By Florian Barral
Last updated About 1 hour ago
What is the manual check?
The Manual check lets you verify the identity of each participant: before starting the exam, they photograph their document and then take a video selfie, and you compare the two. The verification is entirely manual: no AI validates the documents for you.
Prerequisites
In the Configure tab, Proctoring section:
Camera proctoring and identity verification are only available on the Organization plan. If the Proctoring section does not appear, contact us to enable the option.
Set Identity verification to Manual check.
Choose the Required document: Student ID card, or Other… to enter another document (for example, a convocation or a government-issued ID).

Important: these options must be enabled before the exam session opens.
How does it work?
On the participant side:
Before accessing the exam, the participant must capture with their webcam:
A photo of the required document (student ID card by default)
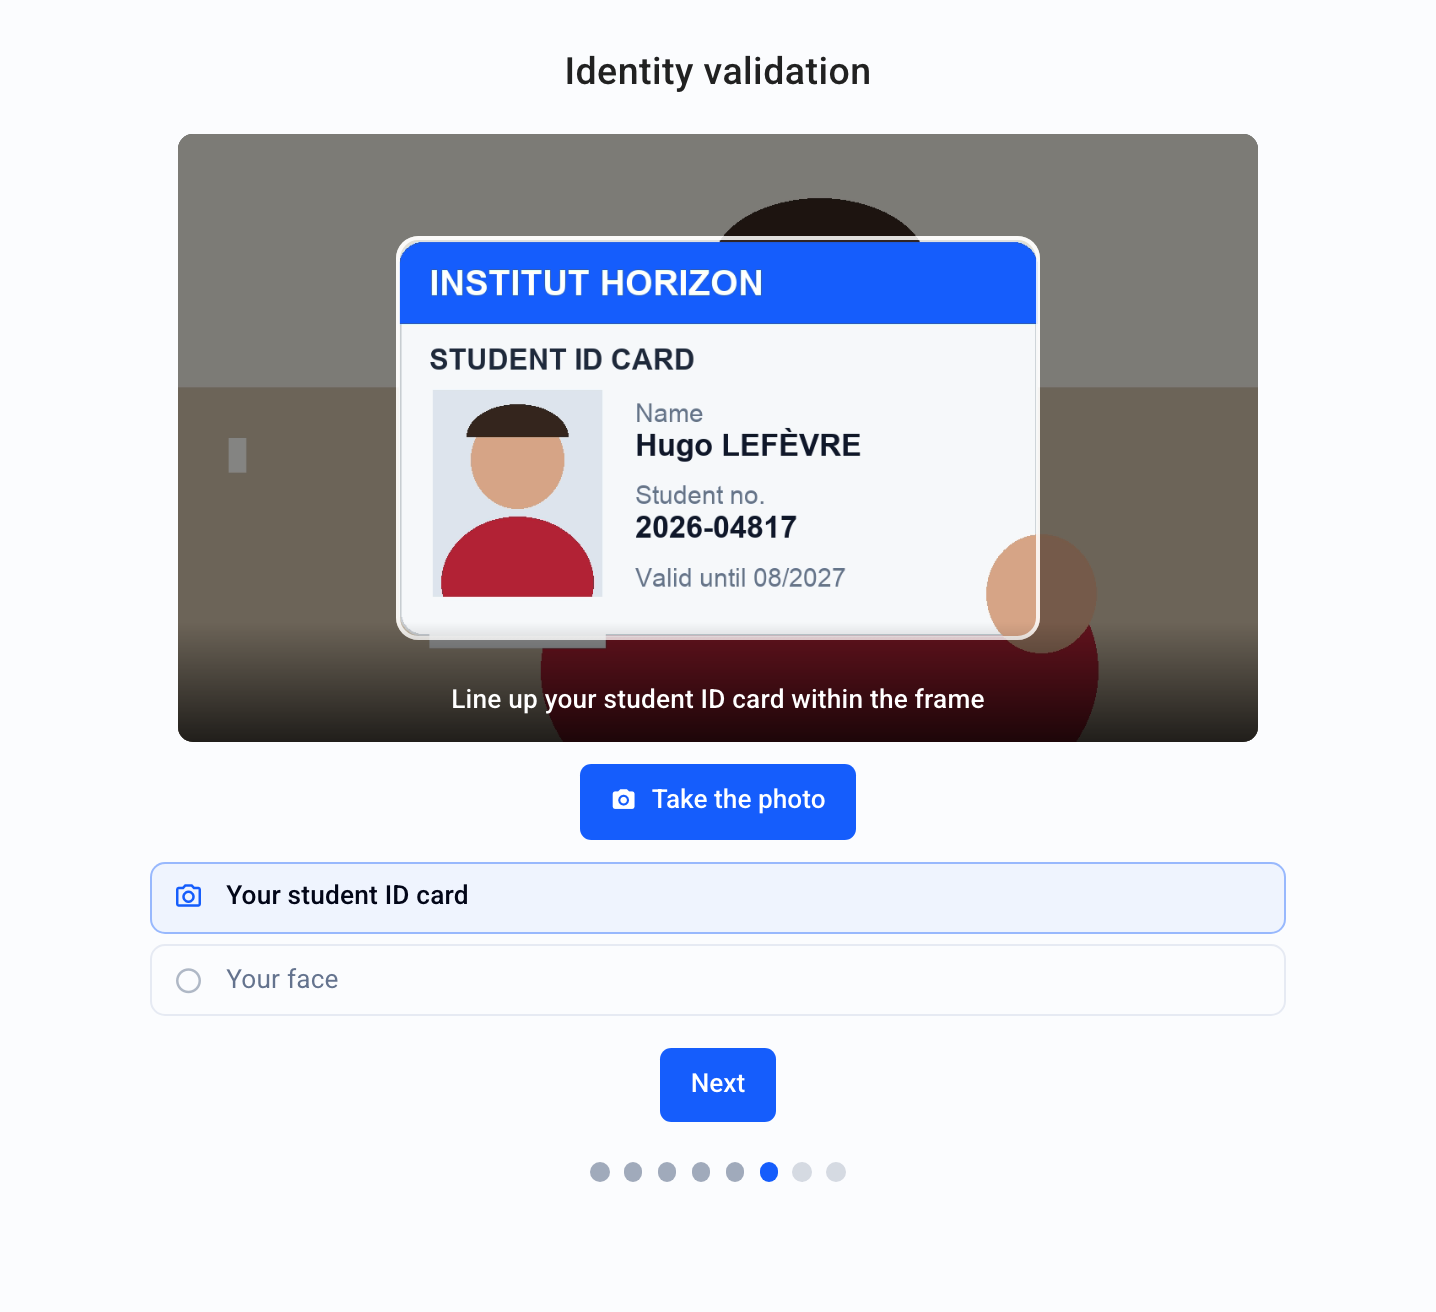
A video selfie: a photo of their face, then a short video during which they move closer to the camera. They cannot start the exam until these captures have been sent.

On your side:
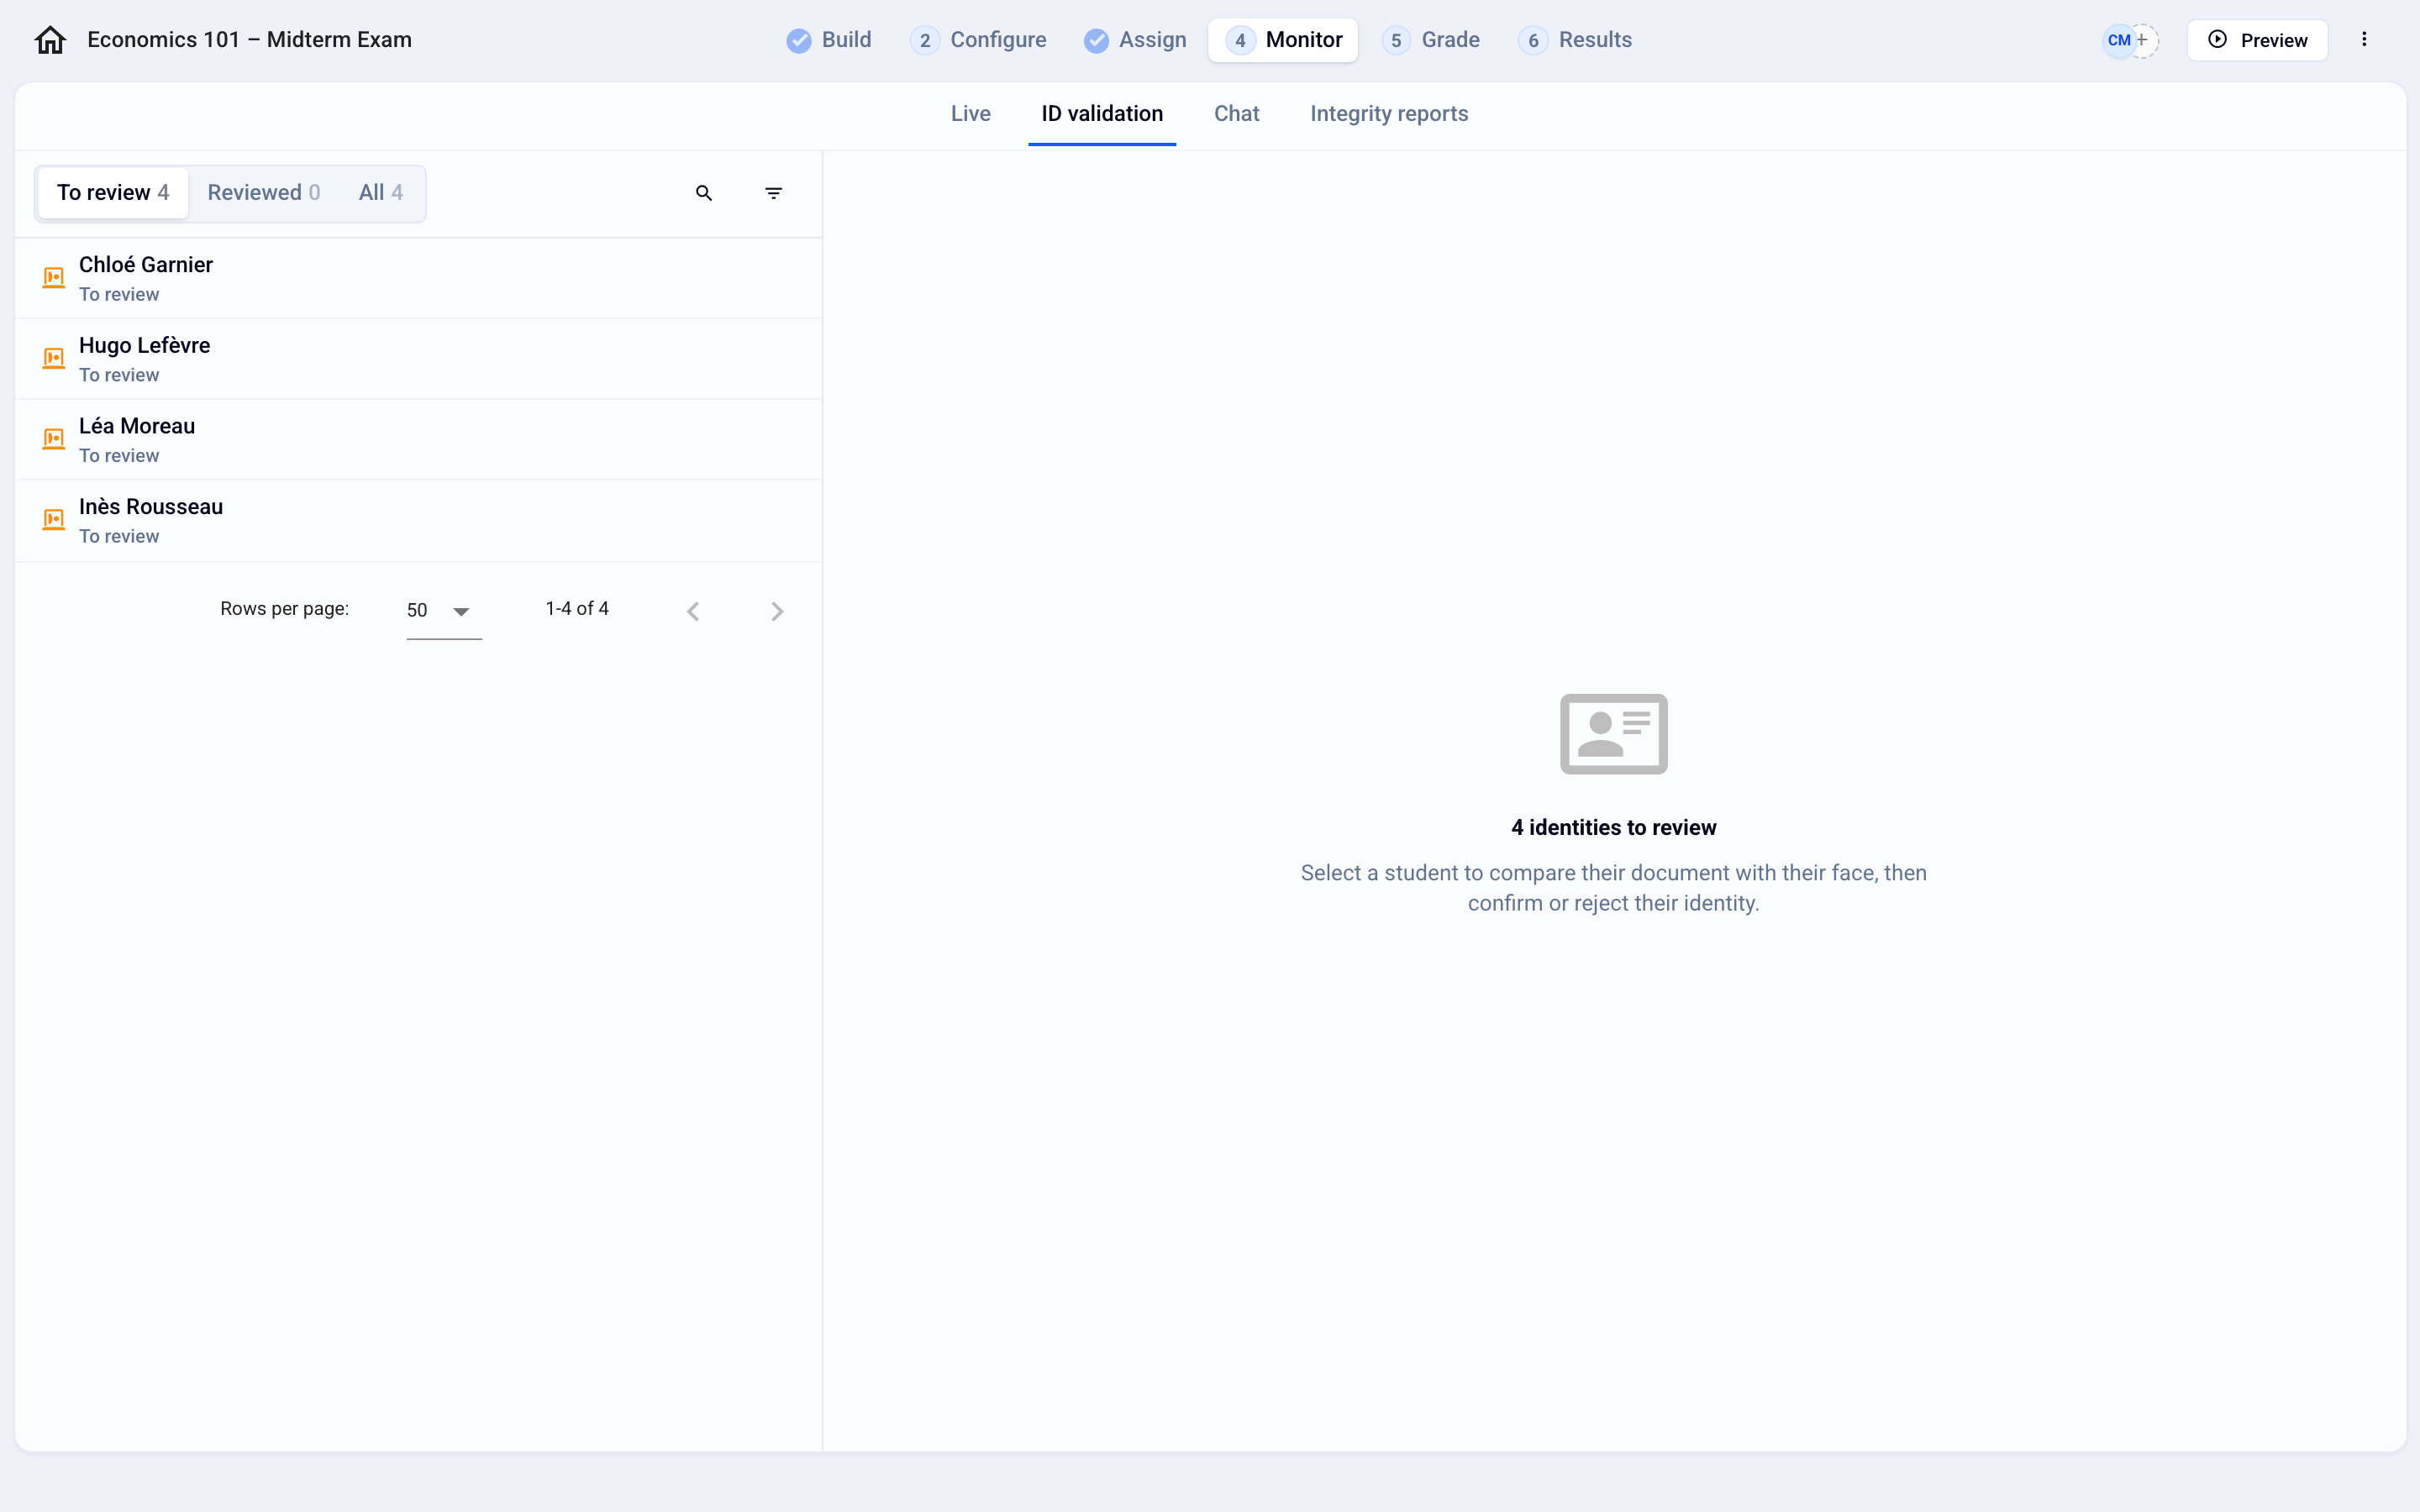
Open Monitor › ID validation: on the left, the participant list can be filtered by To review, Reviewed or All. Click a participant: their document, face photo and video (Play the video) appear on the right.
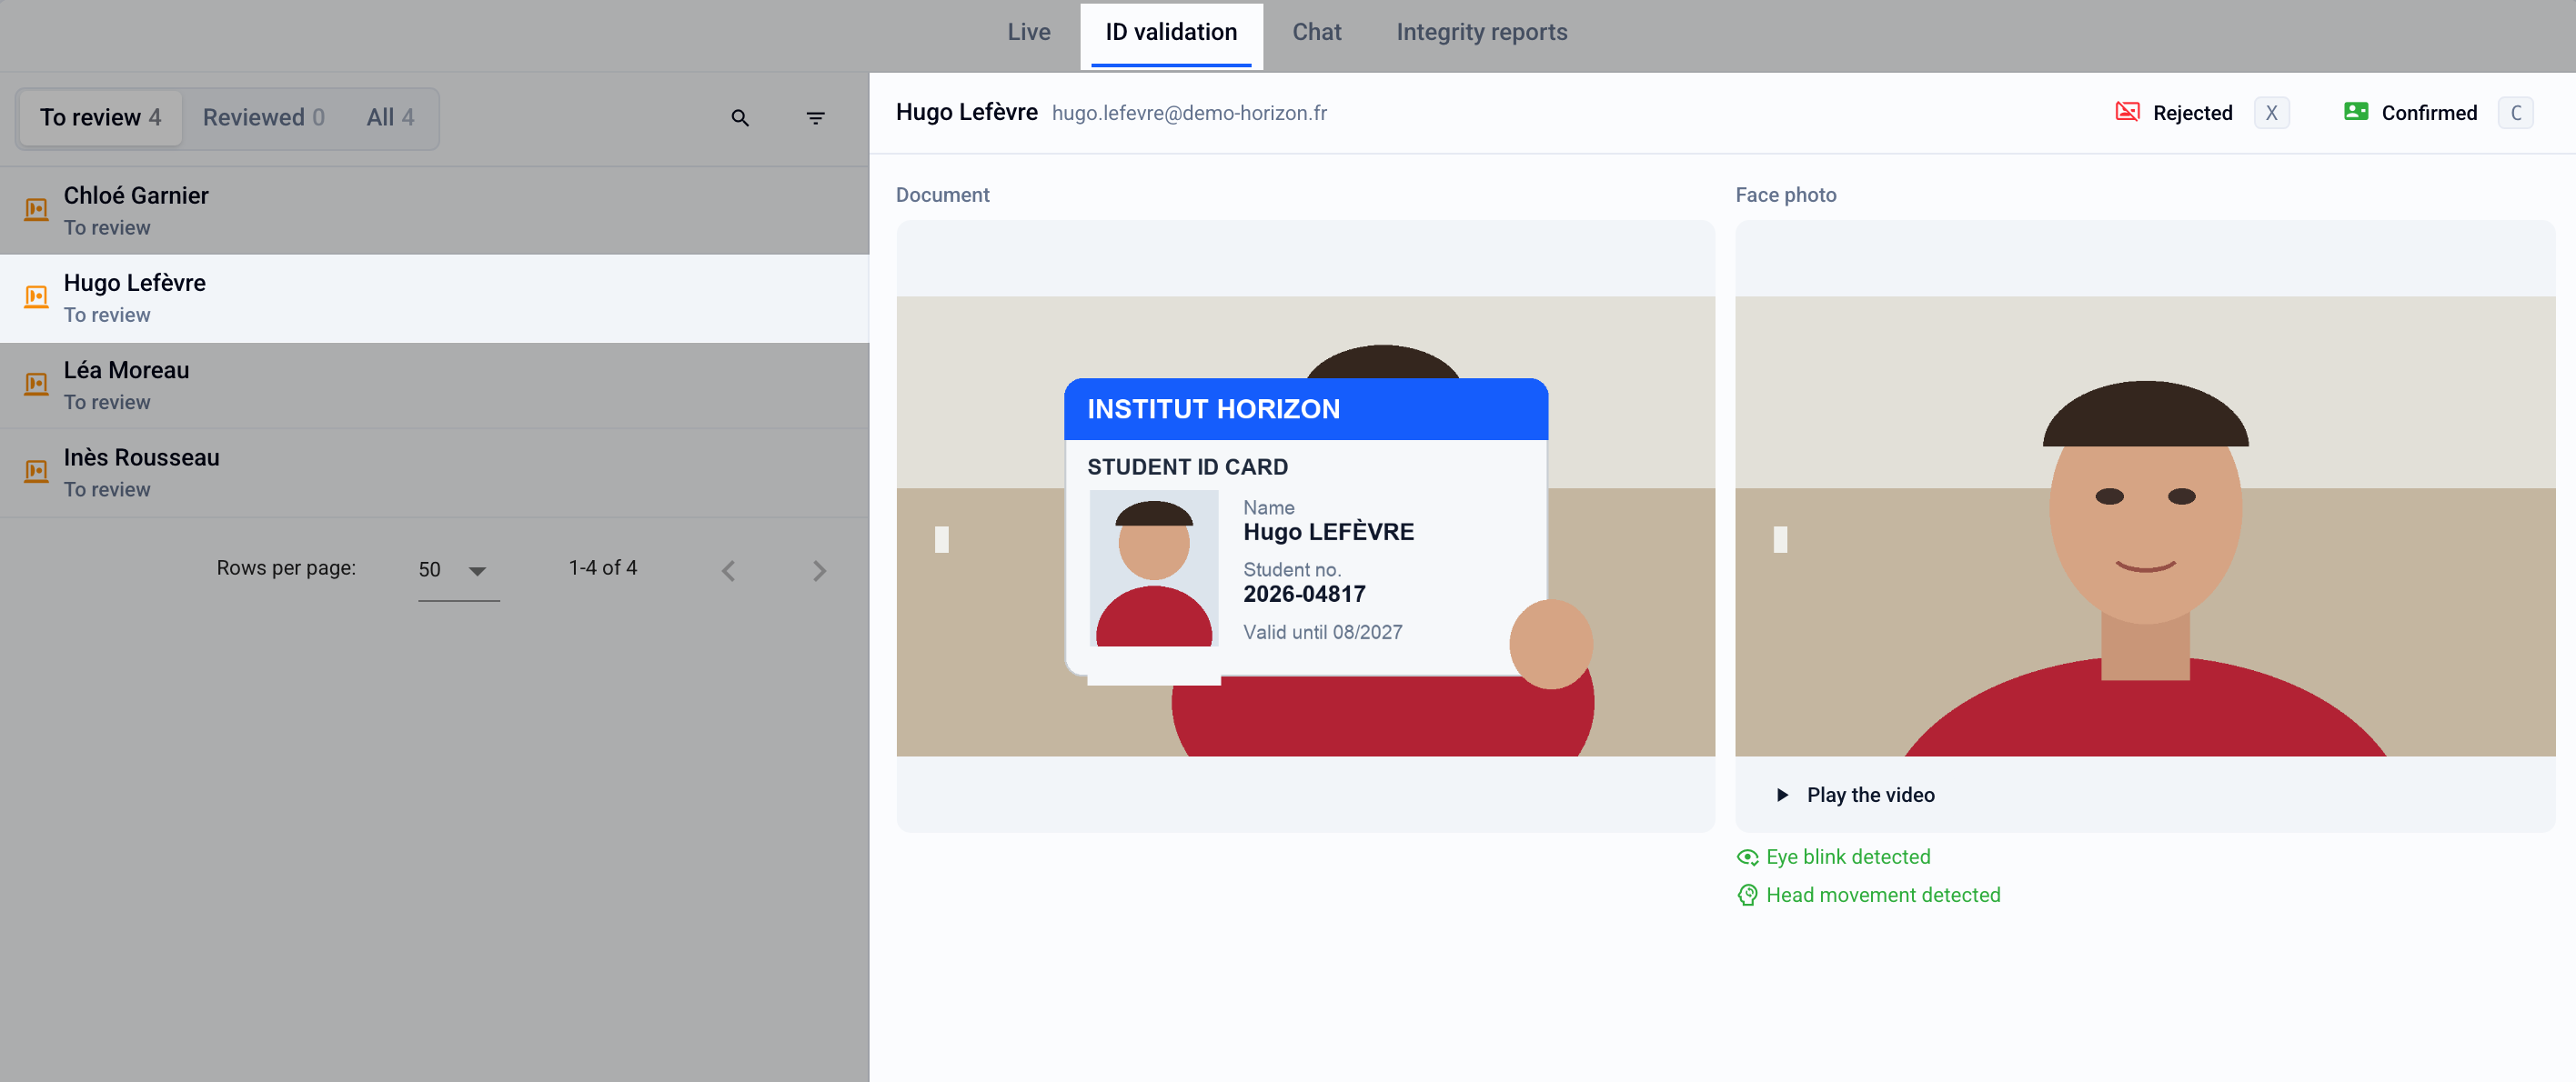
Confirm or reject the identity by clicking Confirmed or Rejected, or with the
CandXkeys on your keyboard. The next participant is then displayed automatically.
Key points
Human validation: you always have the final say. The check happens after the fact: the participant can take the exam before you have verified their identity.
Flexibility: choose the expected document (student ID card, convocation, government-issued ID…).
Full control: you can accept another document if the participant does not have the required one.
FAQ
Why are some participants’ images black or showing a crossed-out camera icon?
Why are some participants’ images black or showing a crossed-out camera icon?
This happens when cameras have a cover or a button that hides the image. Participants see their webcam image at the start of the exam and must confirm they are clearly visible. It can also be a deliberate action by the participant to hide their camera.
What should I do if a participant’s camera does not work?
What should I do if a participant’s camera does not work?
With camera proctoring, the participant cannot finish their setup without an image: the Set up your equipment step waits for an active camera. A single participant cannot be exempted from camera proctoring. Disable Camera Recording, in Monitor › Live › ⁝, only stops the recording.
First, have them try another browser or another computer. As a last resort, set Camera proctoring to None in Configure › Proctoring: this applies to all participants, and you will not be able to re-enable it while the exam is in progress. See A participant is stuck at the start of the exam
Was this helpful?
Still need help? Ask the team